Most people, if they’re honest, generally start their practice session by picking out a piece and starting to play. A few minutes in, and a number of mistakes in fingering and tonguing later, they pause, take stock, actually look at the music, and start thinking about what fingers and tongue really ought to be doing.
Of course, I would never start a practice session this way… *tries to look innocent*
Why do we avoid long notes and technical work?
Here are my best guesses:
We think we’re saving time
We prefer playing ‘real’ music over exercises
We think (secretly or otherwise) that working on scales and technical work is boring and difficult
The fallacy of this as a practice strategy has been brought home to me by watching my son work with his trumpet. He starts nearly every practice session by ‘buzzing’ with just the mouthpiece, and then by running through basic flexibilities – a series of exercises designed to work on breath pressure and finger control. Once he has done these, he turns to his pieces. And what I have noticed is that he plays the pieces so much more effectively and accurately after the flexibilities, far more than if he skips the flexibilities (which happens rarely).
Recorder flexibilities?
So I am wondering what would happen if we recorder players behaved a bit more like brass players in our attention to warming up. It seems likely to me that we would benefit from spending some time on thinking about breathing, breath pressure and co ordination with fingers before embarking on repertoire.
So let’s have a go at playing long notes at the start of a practice session. I’ve been experimenting with it, and have noticed the following:
I think more about how I am lifting the instrument, so experience less tension;
I think about my breathing;
I listen to the sound of the instrument I’m playing. Each note has its own timbre, and varies depending on dynamic;
Playing long notes gives me time to focus my attention on the activity I am about to do. I find myself thinking about playing recorder in the present moment, rather than the rest of the things on my to-do list.
My experience is that playing long notes helps my focus, breath control, and the efficiency of my playing, and all of these help me when I start to work on scales or pieces.
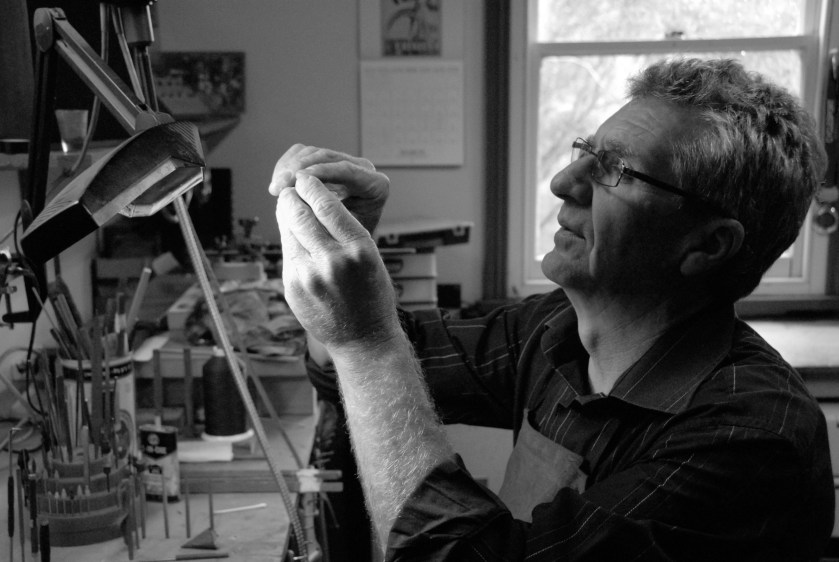
I first met Michael Grinter when I was studying recorder as a teenager with Zana Clarke in Armidale, NSW Australia. Michael was up visiting from Victoria, and very kindly tried to make my inexpensive (and not good) wooden recorder play a little more reliably. He loaned me a recorder; I fell in love with his beautiful instruments, and ordered a 415 treble. It is my prize possession, and plays like a dream.
I kept in touch with him over the years, and he occasionally gave my 415 a once-over, just to keep it playing so beautifully. He was always unfailingly kind and friendly – an email from him always made me smile.
When I started playing in The Biber Duo with my lovely colleague Tim Lanfear, I let Mike know that we were playing his instruments in our concerts; Tim had bought a Grinter 415 secondhand, and even though they weren’t an exact match, they sounded very well together. Mike enjoyed seeing the videos of our performances, and even included one on his new website, grinterflutes.com. He was kind enough to write this:
here’s a lovely video of Jennifer Mackerras playing in a duo with Pink Noise colleague Tim Lanfear. This is the duo’s first concert playing the Telemann Canonic Sonatas – exquisite playing
Last year my duet partner Tim and I ordered matching 440 trebles from Michael. He was thrilled at the challenge of making matching instruments, and our order came at just the right time as he was planning to come back to recorder making. Indeed, he was planning to visit the UK in Spring 2019 for this reason, and I was looking forward to his visit.
Tim and I took delivery of our lovely 440 trebles in October 2018, and we programmed a lovely Boismortier sonata in our December concert to showcase them.
It is likely that our instruments were the last recorders he completed, and he died before we had the chance to perform and record the sound of his beautiful recorders playing together. I will always be sad that he never got to hear them.
He wasn’t just a very good recorder player and a great maker; he was a truly lovely and generous man, and I will miss him very much.
It’s a fairly common thing to meet amateur recorder players who are a bit worried about their breath control as they play. Some run out of breath; others struggle with a sort of unintentional vibrato that causes notes to wobble around. If I meet a player with this sort of problem, I listen to them play to see if they show any of these potential causes:
Playing too softly
Playing too loudly
Not noticing that the recorder does have a degree of resistance in the windway – it’s just really delicate compared with some other wind instruments.
Issues with breathing generally
In today’s post I am going to concentrate on that last point, partly because it is so fundamental to what we do as recorder players, and partly because so many of us feel we don’t do it very well. And if we feel that our breathing is problematic in ordinary daily life, then it is likely our worries will be amplified (quite literally!) when we put the mouthpiece of the recorder between our lips! To cure the problems of unwanted vibrato, we need to get to the bottom of our more general issues around breathing. Therefore, today I am going to give you a whistle stop tour of your respiratory system.
Do you know where you breathe?
It sounds like a silly question, but it’s something that is actually really important. Pretty much everyone knows that the air we breathe in goes into our lungs, but after that, all knowledge is up for grabs! Some people lift their shoulders up to their ears when they take a breath. Others try to ‘breathe into their belly’. Some suck their tummy inwards when they breathe (I’ve heard singers describe this as ‘reverse breathing’). But what is anatomically most appropriate?
It’s an important issue, and can cause a lot of issues around unintentional vibrato. So take a second, and put your hands where you think your lungs are.
Did you put them on your chest?
Lungs are surprisingly large: they start just under the collarbone, and go all the way down to the base of the ribs. They have a truly massive surface area, because we need it to be able to hold all the air we would need to take part in serious physical exertion (or, indeed, playing a contrabass recorder).
Lungs and shoulders
If we think of the lungs as massive sacks for the moment, it seems reasonable that, if the sacks are filling with air, that there would be an expansion involving the ribs and the back. And seeing as the shoulder structures rest over the top of the ribs, it only seems fair that there should be a little accessory motion in the shoulders, too. Note that I say ‘accessory motion’ – raising your shoulders to your ears doesn’t really help you get any more air in your lungs. We don’t end to deliberately lift them, but we shouldn’t be keeping them absolutely still, either.
Diaphragm and belly
The diaphragm is a muscle that you may have head of, and it has an important function in the breathing process. It is the diaphragm contracting downwards that causes the change in pressure in the pleural cavity that starts the process of breathing in. Now, when the diaphragm contracts downwards, it runs into the organs beneath it – primarily the digestive organs. These don’t like being squished, and need to move in order to avoid it. They can’t go downwards, because there’s pelvis in the way, and can’t go backwards because the spine is in the way. So they move outwards as we breathe in – or should do, in a normal breathing pattern.
(If you want to watch a video explaining the system, try this one from Crash Course. The mechanics of lungs and diaphragm are about 5 minutes in)
Breathing control
The trick with breathing is that it is both autonomous AND voluntary. That is to say, we can choose to a large degree when and how we breathe. This is good, because it means that we’re able to talk and play musical instruments! But it also means we can impose ideas and beliefs that can really impede the normal action of the respiratory system. Anyone who has done any classical dance training, for example, probably won’t be comfortable with allowing their belly to move outwards, because it conflicts with good form in classical dance. Or if you’re like some of my classical singing Alexander Technique students, you’ve been told so many times that shoulders should not move while breathing that you actively hold them down!
Rediscover your breath
One of the best ways I know to rediscover the whole respiratory system, after doing a bit of research looking at anatomy books and YouTube videos, is to lie down and feel what you do when you breathe.
I would suggest lying on your back on the floor, with your feet flat and your knees pointing towards the ceiling. You can put some padding under your head if you like. And breathe. Notice what happens in your chest, shoulders and back. Notice what your belly does. Once you’ve started to acquaint yourself with your breathing patterns, start experimenting with allowing movement through your ribs, back and abdominal region as you breathe in and out.
It is tempting, too, to focus solely on breathing in. I would strongly recommend that you spend just as much time noticing what happens as you breathe out. Notice which muscles are working, and which ones relax. See if you can make your out-breath more tension-free.
If you have problems with an unwanted vibrato, it is likely that you’ll have found some unwanted tension in your breathing, and that you may have had an incomplete notion of how the whole system works. So spend a couple of minutes each day investigating what your breathing is doing today, and think about allowing the process to be more closely aligned to an anatomic normal. Once you feel happy with what you are doing, get back up and start to play. Or you could even try playing long notes while lying down, and see what you notice about the sound.
Next time I’ll speak more about long notes, and about issues of dynamics and windway resistance. But for now, just enjoy experimenting with your respiratory system.
Imagine that you’re working on a new piece. It has a quaver or semi-quaver run in it, and you need to learn a new fingering pattern that you’re not used to. It also involves a particular pattern of tonguing and slurring that makes it trickier.
How would you work on this? What would be the best approach to make practice easier?
Slow down!
My first tip is to slow the passage right down. If I’m working on a new piece, I’ve been known to attempt new fingerings and note patterns at less than a quarter of the suggested metronome marking. Or slower: a musician that my son follows on YouTube, a bassist called Adam Neely, once emphasised the SLOW nature of slow practice by asking his viewers to play ‘glacially slow’.
We slow right down because pretty much all of us are tempted to try to be perfect immediately. We want to be able to play our shiny new piece at the suggested tempo – except we can’t. We haven’t done the work yet. I know that playing slowly can be frustrating, but not nearly as frustrating as trying to play quickly and failing. So keep it slow. Glacially slow.
Divide and conquer
Start off by deciding whether you want to get the notes under your fingers first, or feel comfortable with the tonguing. Once you’ve decided, spend some time on one, and then on the other.
Tonguing: put the recorder down, and say the tonguing pattern out loud, in the metre of the piece, at the nice slow speed you’ve picked. In the example below, remembering to tongue the E after the semiquaver slur might be tricky. If I was working on this passage, I would say the tonguing (written in over the notes) a number of times to make sure I was completely comfortable with it. Note that I’ve also chosen a particular articulation. It’s fairly samey, but it might look different if some of the notes were marked staccato.
Notation: again, play the notes at the glacially slow speed you’ve chosen. Don’t even worry about what your tongue is doing for the moment – just make sure you have all the right fingerings. Do it a few times at that speed. You could try it a little faster and see if you can spot any ‘micro finger flails’ *- this tells you which parts of the passage you’re not comfy with thus far. Go back to the slow speed and work on it some more.
Adding them together
When you’re confident that each skill feels comfortable, try adding them together – at the glacially slow speed. Then gradually speed it up.
How long does this process take?
It depends! Sometimes it will be just a single bar that has you foxed, and you’ll fix it in a minute or two. Sometimes it will be sections of a longer run, and you’ll find yourself mouthing tonguing patterns as you wander around the supermarket. But in reality, the speed of success doesn’t really matter; what matters is that you get the passage under your control so that you feel confident when you play. That’s all that counts.
* Hat tip to Lynne Phillips (@teachypiano on Twitter) for this wonderful phrase.
Typically speaking, when a student first starts recorder, they begin by learning the importance of a steady breath stream and how to use their tongue to start each note. And usually, people start off by using a ‘t’ sound.
It’s a great starting place for articulation: it’s easy to do and creates a good clear sound, especially in the mid-register where most people start learning their notes. But if you are using a faster breath stream to play a little more loudly, or if you are playing lower notes, sometimes you might find that you get a little unwanted ‘pop’ sound before the note. If you are particularly vigorous, the note may break or not sound properly at all!
So you could try playing more softly by using a little less air, or you could start to play with your articulation by using different sounds to start the note. Think about how many different consonants you can make without using your lips to form them: d, g, r, l, n. You can use all of these as articulations when you play your recorder.
Each articulation creates a very different sound and attack on the note; some create a different sound post-attack; some are great for playing at speed; all of them can be used to create different moods and characters to your melodic line.
If you’re more a beginning player, start off by trying a ‘d’ sound and see if that helps you to make your melodies more smooth.
If you’re an intermediate to advanced learner, practise using different articulation in your scales and arpeggios. Then try experimenting with different articulations as you work on your repertoire. You can use different sounds to help you with phrasing, or to emphasise certain notes or beats. They’ll also help you to play high notes without them cracking so much.


 Typically speaking, when a student first starts recorder, they begin by learning the importance of a steady breath stream and how to use their tongue to start each note. And usually, people start off by using a ‘t’ sound.